With the growing popularity of laser cutters, there has been a surge in the number of people making their own projects. If you are just starting out with this technology, or if you want to improve your skills, keep reading for some tips on how to design and prototype your laser cutter projects.
What is a Laser Cutter?

A laser cutter is a device used in the manufacturing of printed circuit boards, parts, and prototypes. It uses a focused beam of light to cut through material.
What are the benefits of using a laser cutter?
There are many benefits to using a laser cutter over other manufacturing methods. They are fast and accurate, which means that they can produce high-quality parts quickly. They also have reduced environmental impact because they use less energy and produce less waste than traditional manufacturing methods. Finally, laser cutters are versatile tools that can be used for a variety of tasks, making them ideal for custom design work.
Tips For Your Next Project
Laser cutters have become increasingly popular over the last few years, as their capabilities have grown and prices have fallen. This popularity has led to a proliferation of projects that use laser cutting services to create objects from a variety of materials.
This article will outline the types of material that can be cut with a laser cutter, and provide tips on how to design and prototype laser cutter projects.
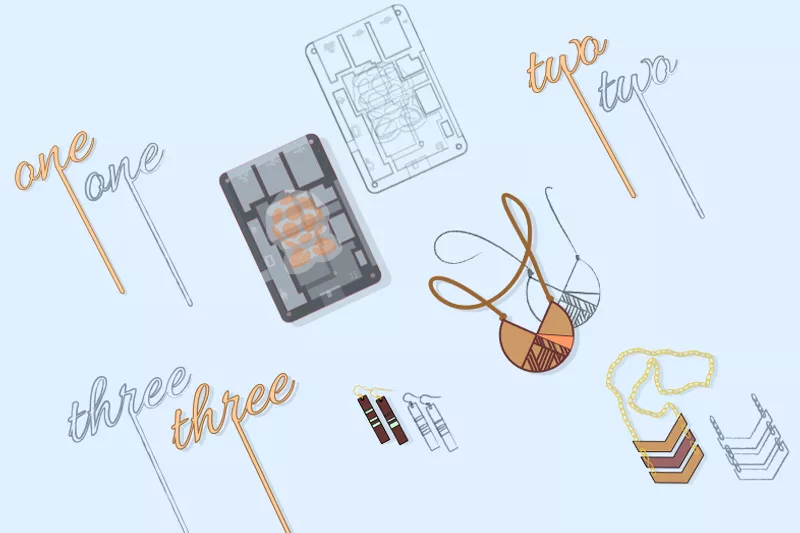
- The first consideration when designing a laser cutter project is the target material. Laser cutters are capable of cutting a wide range of materials, but some are better suited than others for certain types of projects. Some common materials that can be cut using a laser cutter are wood, plastic, fabric, paper, and metal. Each material has its own characteristics that should be considered when designing a project around it. For example, wood is strong but brittle, while plastic is flexible but can be brittle. It is important to understand the properties of the material you are planning to use before starting your project. This information can be found online or in specialized guides for laser cutters.
- Once you have determined the type of material you want to use, you will need to decide on the dimensions of the object. This information can be found in the material’s datasheet or in specifications for the laser cutter you are using.
- Once you have the dimensions of the object, you can start designing your project. In most cases, a laser cutter will require that the object be cut on a “flat bed” – a platform that is permanently mounted to the laser cutter and used to hold the material during cutting.
- When designing your project, it is important to keep in mind the limitations of your laser cutter. For example, some lasers are more capable of cutting thick materials than others. It is also important to remember that laser cutters can easily overheat if they are used incorrectly, so it is important to keep an eye on the temperature while cutting.
- Finally, it is important to test your projects before they are actually cut. This can be done by printing out a copy of your project and cutting it out with a scissors or an ordinary knife. Once you have verified that your project works as expected, you can then move on to cutting the actual material.
Designing Your Project Using CAD Software

When designing a laser cutter project, it is important to use CAD software to help ensure the project is properly designed and scaled. CAD software can also be used to create accurate prototypes. Here are some tips for designing and prototyping laser cutter projects using CAD software:
- Use accurate dimensions when designing your project. CAD software can be used to create accurate drawings of your project that can be used to generate a manufacturing plan. Using accurate dimensions will help ensure your laser cutter project is accurately manufactured.
- Use auto-correction features when creating drawings. Auto-correction features in CAD software can help you avoid making mistakes while drawing your project. By using auto-correction features, you can ensure that your drawings are always accurate and error-free.
- Use preview modes when creating drawings. Preview modes in CAD software can allow you to see how your drawings will look before you actually create them. This can help you avoid making any mistakes while designing your project.
- Use 3D printing technology when prototyping your project. 3D printing technology can be used to create accurate prototypes of your laser cutter project without having to build them yourself. This eliminates the need for multiple rounds of prototyping, which can be time-consuming and costly.
- Use laser cutters that are compatible with your CAD software. Laser cutters that are compatible with your CAD software will allow you to create accurate drawings and prototypes of your project.
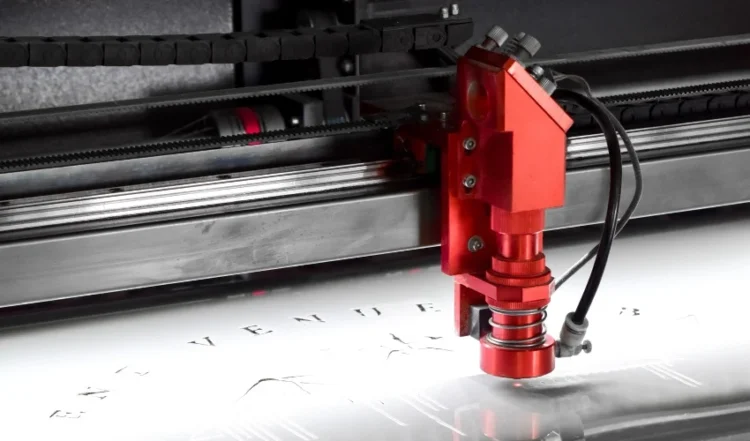
Cutting the Parts Out of the Material Using a Laser Cutter

If you’re thinking of using a laser cutter to create your next project, you’ll want to be sure to follow some basic tips. This will help ensure that your laser cutter works correctly and produces the best results. Here are a few things to keep in mind:
- Choose the right material. Laser cutters work best with materials that are cut cleanly and without too much distortion. If the material is too thick or heavy, it will cause the laser to heat up and distort the part.
- Make sure your material is properly prepped. Before cutting anything, make sure the material is properly prepped by cleaning it with a degreaser or alcohol, then dry it off completely. This will ensure that the laser cuts through the material easily and without any damage.
- Use accurate measurements when cutting parts out of your material. When using a laser cutter, even small mistakes can result in inaccurate parts that don’t fit well or don’t function as intended. Make sure to measure your parts accurately before starting to cut them out so you don’t have any surprises later on.
Finishing Touches and Testing Your Project
After completing a laser cutter project, there are still a few last steps that need to be completed. Here are a few tips for finishing touches and testing your project:
– Inspect your finished product for any defects. If there are any problems with the laser cutter or the project itself, fix them before proceeding.
– Check the accuracy of your cuts by measuring the length and width of the objects you cut. Compare these measurements to what you entered into the software. If they don’t match, make adjustments to your settings until they do.
– Test the functionality of your laser cutter by cutting some cardboard or paper. Make sure that everything works as it should, including the power cord, lens, and controller.